Custom patches are used on jackets, uniforms, hats, bags, and many other items across Canada. Some people use them for teams or clubs, while others use them for workwear or personal style. Even though a patch looks small, it goes through a clear process before it is ready to wear.
This guide explains how custom patches are made in Canada in simple steps. It also covers custom embroidered patches, backing types, sizing, and common mistakes to avoid. The aim is to help you understand the process so you can choose the right patch for your needs.
How does the patch making process start?
The first step is always the design. A patch needs a clear design that can be turned into thread, fabric, or print.
What information is usually needed?
-
The logo or artwork file
-
The patch size in inches or centimeters
-
The shape such as round, square, shield, or custom cut
-
The number of colors
-
Where the patch will be used such as hat, jacket, or uniform
Many people start with a simple logo. If the design has tiny details, it may need small changes so it stays clear after stitching.
How is a patch design prepared for production?
Before stitching begins, the design is prepared so machines can follow it. This step is often called digitizing for custom embroidered patches.
What happens during this step?
-
The design is turned into stitch paths
-
Stitch direction is planned for a clean look
-
Areas of the patch are set for fills and borders
-
Thread colors are matched as closely as possible
A good preparation step helps the final patch look neat, especially with text and sharp edges.
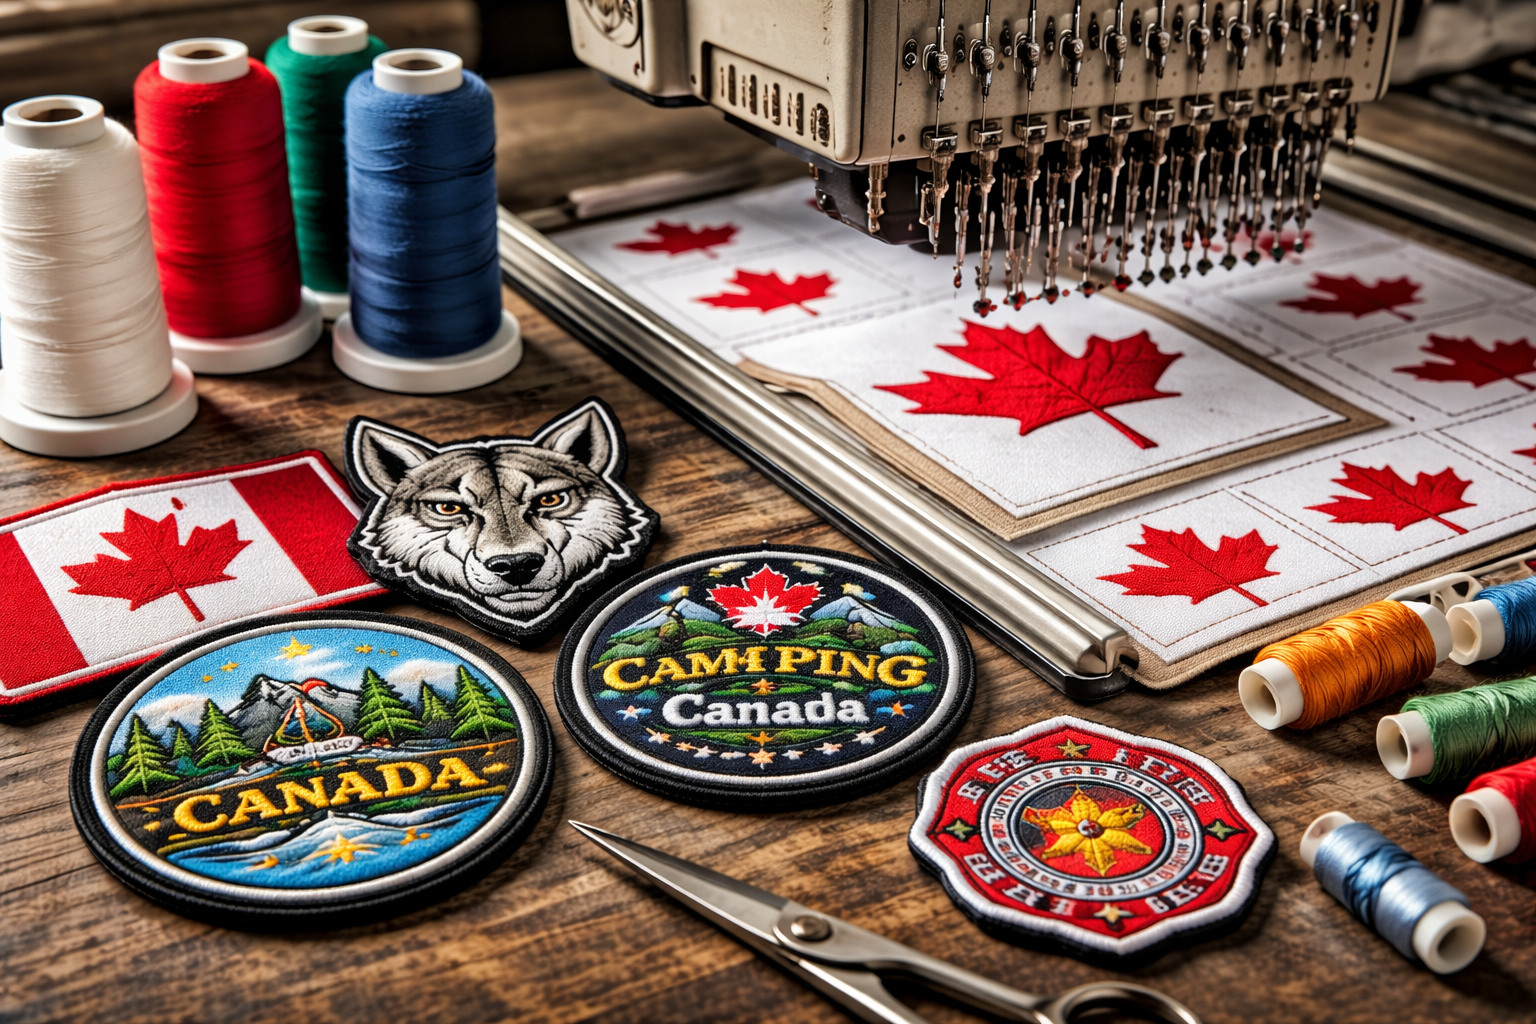
How are custom embroidered patches made?
Custom embroidered patches are made by stitching threads into a fabric base. This is one of the most common patch styles because it is strong and has a classic texture.
What are the main parts of an embroidered patch?
-
Fabric base, often twill
-
Embroidery thread for the design
-
Border stitching to seal the edges
After stitching is complete, patches are cut into shape and finished with a clean border.
What types of borders are used on patches?
Borders help keep the patch edges from fraying and help it keep its shape.
Common border types
-
Merrowed border
-
Heat cut border
A merrowed border is thicker and works best for simple shapes like circles. A heat cut border is better for detailed shapes and sharper corners.
How do patch makers choose the right patch type?
Not every design suits embroidery. Canada based patch makers may suggest a different type if the design is very detailed.
Common patch types
-
Custom embroidered patches
-
Woven patches
-
Printed patches
-
Chenille patches
Embroidery is best for bold designs. Woven patches work better for fine lines and small text. Printed patches suit artwork with gradients or photo style images.
How is backing added to custom patches?
Backing is the layer on the back of the patch that controls how it attaches to clothing.
Common backing types used in Canada
-
Sew on backing
-
Iron on backing
-
Velcro backing
-
Peel and stick backing
How do you choose backing?
-
Sew on is best for long term use and frequent washing
-
Iron on is good for casual wear
-
Velcro is useful for uniforms that need patch changes
-
Peel and stick is for short term use only
Backing choice matters as much as the design because it affects how long the patch stays in place.
How do patch makers handle sizing and placement?
Sizing is chosen based on where the patch will go. A patch on a cap needs a different size than a patch on a jacket back.
Simple sizing guidance
-
Hat patches are small and clean
-
Chest patches are medium sized for easy reading
-
Sleeve patches are narrow
-
Back patches can be large and bold
The goal is to keep the patch readable without making it feel too heavy on the fabric.
Table: Patch making steps and what they do
| Step | What happens | Why it matters |
|---|---|---|
| Design shared | Artwork, size, and shape are set | Sets the full plan |
| Design prepared | Stitch paths and layout are made | Helps clarity in stitching |
| Production | Patch is stitched, woven, or printed | Creates the patch look |
| Edge finishing | Border is added and patch is cut | Stops fraying |
| Backing added | Sew, iron, Velcro, or stick layer is applied | Controls attachment |
| Final check | Patch is reviewed for shape and detail | Avoids defects |
What quality checks are done before patches are sent out?
Before patches are completed, they are checked for basic quality.
Common quality checks
-
Clean stitching with no loose threads
-
Strong border edges
-
Correct size and shape
-
Color match close to the design
-
Backing properly applied
These checks help avoid patches that curl, fray, or look unclear.
FAQs
How long does it take to make custom patches in Canada?
Time depends on the design and the number of patches. Larger orders take longer than small ones.
Can custom patches be washed?
Yes. Most patches can be washed. Cold water and gentle drying help patches last longer.
What is the best patch type for small text?
Woven patches usually handle small text better than embroidery.
Which backing is best for uniforms?
Sew on backing is often best for uniforms that go through regular washing. Velcro can also work for uniforms that need patch changes.
Do custom embroidered patches last long?
Yes. When stitched well and cared for properly, embroidered patches can last for years.
Conclusion
Custom patches Canada are made through a clear process that starts with the design and ends with finishing, backing, and quality checks. Custom embroidered patches are popular because they look classic and hold up well for daily use. By understanding patch types, border options, backing choices, and sizing, you can make better decisions and avoid common issues.
Visit here for more Informational blogs at playspinnly.