Introduction
Your company logo is a powerful symbol. It represents your brand’s identity on websites, business cards, and product packaging with crisp, digital perfection. But when you want to translate that logo onto a uniform polo, a branded cap, or a corporate gift, you enter a new realm—the world of thread and fabric. This is where a direct print or transfer falls short of the textured, premium feel of embroidery. Bridging this gap from a flat, digital graphic to a dimensional, durable piece of stitch art is not a simple task of file conversion. It is a skilled craft performed by professional digitizers for embroidery.
These experts act as translators and engineers, reinterpreting your logo for a completely different medium. Let’s explore the fascinating, step-by-step process of how a digitizer transforms your pristine logo into flawless embroidery art.
The Core Challenge: From Pixels to Physics
First, we must understand why a logo can’t just be “converted.” A digital logo (like a .AI or .EPS file) is created for a flat, static, and luminous medium—a screen or glossy paper. It can use unlimited colors, gradients as smooth as air, and lines as thin as a single pixel.
Embroidery is a physical, tactile medium governed by real-world physics:
-
Thread has thickness. A single stitch is not a pixel; it’s a tangible length of fiber.
-
Fabric moves and stretches. It reacts to tension and needle penetration.
-
Layers build up. Thread stacks on top of thread and stabilizer.
A digitizer’s job is to solve this puzzle: How do you recreate the essence of the logo using these physical constraints, while maintaining its recognizability and professional impact? They don’t just trace; they re-engineer.
The Transformation Process: A Step-by-Step Journey
Phase 1: Analysis & Strategic Planning
The process begins with a conversation, not software. A professional digitizer will ask key questions:
-
What is the target garment? (A structured cap, a stretchy athletic shirt, a soft fleece)
-
What is the final stitched size? (A 1.5-inch left chest logo vs. a 10-inch back design)
-
What are the brand’s color standards? (Providing Pantone or specific thread brand codes)
With this brief, they analyze the logo’s artwork. They identify potential trouble spots: tiny text, subtle gradients, thin lines, and intricate details. They formulate a plan for simplifying without losing the logo’s soul.
Phase 2: Intelligent Simplification & Adaptation
This is the first act of translation. The digitizer decides what elements will translate faithfully and what needs adaptation.
-
Gradients become color blocks or texture: A smooth sky-blue fade might be recreated using two solid shades of blue thread, with the stitch direction used to create a visual blend.
-
Fine lines are thickened: A hairline rule in the logo must be widened to at least 0.7mm to be stitched as a satin column, otherwise it would vanish.
-
Negative space is protected: The small gaps inside letters (like ‘e’ or ‘a’) are evaluated to ensure they won’t be sewn shut by surrounding stitches.
-
Colors are consolidated: A logo with 12 shades of gray for a 3D effect might be skillfully reduced to 3 or 4, maintaining the illusion of depth.
Phase 3: Manual Digitizing – The Art of Stitch Crafting
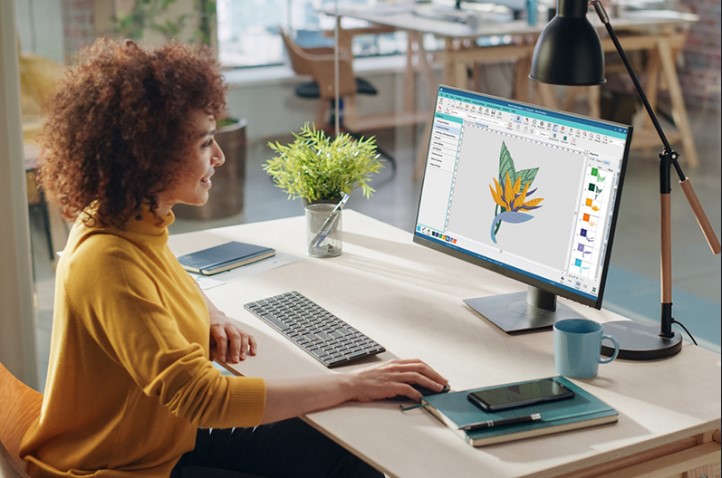
Now, using professional software like Wilcom or Pulse, the digitizer manually builds the logo, stitch by stitch. This is where the true artistry meets engineering.
1. Building the Foundation: Underlay
Before a single visible stitch is placed, the digitizer creates the underlay. This is a hidden framework of stitching that:
-
Stabilizes the fabric to prevent puckering.
-
Anchors the top stitches for a smooth, raised appearance.
-
Pushes down the nap of fabrics like towels or fleece for a clean surface.
Think of it as the concrete foundation for a building. Without it, the structure is weak and unstable.
2. Assigning Stitch Types with Intent
The digitizer chooses the right “brush” for each part of the logo:
-
Satin Stitches: Used for borders, text, and any element with a width under 7mm. They create a smooth, glossy rope-like effect.
-
Fill Stitches: Used for larger, solid areas. The digitizer controls the angle and pattern of these fills to add visual interest and reduce fabric pull.
-
Run Stitches: Used for very fine details, single lines, or intricate outlines where a satin stitch would be too bulky.
3. Applying Pull Compensation
Thread naturally pulls fabric as it sews. If ignored, circles become ovals and sharp corners become rounded. A digitizer proactively applies pull compensation—digitally adjusting shapes to counteract this pull. They slightly widen the inside curves of letters and extend points so they sew out perfectly. This is a hallmark of expert digitizing.
4. Engineering the Sew Sequence
The order of operations is critical. The digitizer sequences the design logically:
-
Stitching from the center outward to minimize distortion.
-
Sewing background elements before foreground details.
-
Grouping all areas of the same thread color together to minimize changes.
This creates an efficient, clean sew path that reduces machine runtime and thread trims.
Phase 4: Testing & Refinement – The Crucible of Quality
The most critical step separates amateurs from professionals: the physical test sew-out.
-
The digitizer stitches the file on a swatch of the specified fabric.
-
They examine it for registration (alignment), puckering, tension, and overall look.
-
Does the small text read clearly? Do the colors look right? Does it feel appropriately flexible?
Based on this real-world test, they return to the digital file and refine it. They might adjust densities, tweak underlay, or fine-tune pull compensation. This iterative loop continues until the stitch-out is perfect.
The Value Delivered: More Than Just a File
When you receive the final embroidery file from a professional digitizer, you’re not just getting a .DST or .PES. You are receiving a guarantee of quality. The value is immense:
-
Brand Integrity Preserved: Your logo looks crisp, professional, and consistent on every garment.
-
Production Efficiency: The file runs smoothly on machines, minimizing downtime and waste.
-
Durability: The embroidery is engineered to withstand washing and wear.
-
Peace of Mind: You have a reliable digital asset for current and future orders.
Conclusion: The Indispensable Alchemists
The transformation of a digital logo into embroidery is a form of modern alchemy. Digitizers for embroidery are the skilled alchemists who perform it. They combine an artistic eye with a deep understanding of textile science and software mastery. They don’t just convert your logo; they interpret it, solve its physical challenges, and rebuild it as a new, tactile art form—stitch art. By entrusting this process to experts, you ensure that your brand’s emblem makes the transition from screen to fabric not just intact, but enhanced by the timeless, premium quality of perfectly crafted thread.